Showing posts with label paper crafting. Show all posts

Friday, February 17, 2012

10 from 3 Card Workshop and a Contest!

I just released another new paper crafting workshop on Craftsy.com!  This is one for all of the card lovers out there - especially those with limited time, or limited supplies!

You can make 10 cards with just 3 sheets of 12x12 paper and 10 card bases.  I used supplies from Close To My Heart, but you can use any supplies you have on hand.  Don't believe me?  Check it out:

Click HERE to purchase this template.

Additionally, it's been a while since I've done any kind of blog candy, or give away on my blog.  So I'm going to do that!

Purchase my template above, make a set of cards, and send me a photo of your completed cards that I can post on my blog (you may watermark your photo if you desire).  Email the photo (high resolution please) to nonapearl@firebin.net.

Complete all this by TUESDAY, FEB 28th.  I will post the photos to my blog on the 29th, and randomly select one of the entrants to win this collection of new CTMH stamp sets seen below (a $72 value!!)  

Contest open to anyone.  Shipping of the stamps is included if winner is a US residents.  Resident of other countries must pay shipping to be determined by zip code.

Monday, February 6, 2012

Hey Sweetie Pie!

I have a brand new paper crafting template to share with you!  I took a break from designing over the holidays, but I'm back baby - and this template is SUPER cute.  I think you'll enjoy making these little paper pies for any occasion, but they seemed quite appropriate for Valentine's Day!

Because this is a "mini" workshop, I've lowered the price to just $3!

Here are few detail shots of the layout:


In addition to the 2 page 12x12 layout, you'll also learn to make 2 adorable cards.  And you can take your "baker's knowledge" and create dozens of pies for cards and layouts in the future.  You can even switch out your colored patterned paper for blue to make masculine blueberry pies!

When you click the link above, you'll be taken to Craftsy.com where you can purchase all of my available patterns - both knitting and paper crafting.  You can also browse a great collection of other crafty patterns.  It's a fantastic site!

If you pop over to my "Paper Crafting Templates" page (see the link at the top of the blog), 
you'll notice a few changes as well.
All of the templates featuring current papers (or templates that can be made using any papers) are still on the top, but I've put all of the rest in the "retired" section.  These are still available, but you have to email me directly to purchase them.  However, now that they are "retired" I've lowered the price to just $3.  So if there was a particular pattern you'd had your eye on for a while, you can get it now and at a discount to boot!

Keep checking back for more new patterns that will be coming soon!  I can't wait to get my hands on all the fun new CTMH products in the new Spring/Summer 2012 Idea Book!


Friday, June 10, 2011

Bonus Template for June

I'm interrupting the regularly scheduled junking post to bring you a new BONUS template for June.

This month Close To My Heart has decided to continue selling the "You and Me" kit through the end of June (or while supplies last) as a fund raiser.  A portion of the cost of each kit sold will support victims of the recent severe storms that have hit the midwestern and southern states.  The value of the kits exceeds $34.95, but they have put them it sale for just $15!

I may not be a consultant any longer, but I admire what the company is trying to do, and I wanted to do my part as well.  So, I've designed this bonus template featuring the "You and Me" kit.  With this kit, my template and a few additional supplies, you can make 2 complete mini album binders with 10 pages each!

Additionally, I will donate $1 from each "You and Me" template sold to the same charity that CTMH is donating to - the American Red Cross.  I will also donate $2 from the sale of each "You and Me" limited teacher's license.

These albums make a great teacher's, graduation or father's day gifts, or special mementos for birthday celebrations or summer parties.  And best of all, using just one You and Me kit (and a few additional supplies) you can make BOTH albums!

Here is a quick look at some of the details of the pages inside the mini albums:

To purchase the Template for creating these 2 albums click here - Add to Cart


To purchase a Limited Teacher's License for this template, select the kit below.

Kit Template:


To read more about what you can do with a Limited Teacher's License, or to see my other Templates for sale, just click on the "Nona's Papercraft Templates" tab at the top of this blog.

You will need the You and Me kit, a few additional sheets of cardstock, and two of the My Creations 3-ring binders to complete this project.  I'm not a CTMH consultant, so you will need to purchase these items from YOUR consultant.  If you don't have one, you can always check out Christine David's website!  She is MY consultant, and a great friend!


View Cart

Thursday, June 9, 2011

Junking Treasures Pt. 3 (AKA - The Wreath Tutorial)

As promised, I've returned with another fabulous craft project - made with pages from an old book I picked up junking over the weekend.

Here it is!  I'm going to call it the "Fame and 'Fortune' Wreath" because the flowers are actually little origami fortune tellers (yes - just like the ones we made as kids), and you'll instantly be the most famous crafter on the block when your friends hear that you made it!  Just kidding... I'm actually thinking of naming it the Hydrangea wreath, because to me, all the little flowers look like hydrangea blossoms.  But you can think of it either way.


With a little patience (and a nifty glue gun) you too can make this wreath!  Let me show you how...

First, you'll need a foam wreath (I've used the 12" size), a glue gun and lots of glue sticks, a paper cutter, and some glue dots or double sided adhesive, a few stright pins, and about a yard of ribbon.


Next you'll need a book.  It doesn't have to be old, antique, vintage, or cost a bazillion dollars.  Older books with slightly yellowing pages look cool - but you could pick up a 1980's romance novel from the thrift store for 25 cents and that would work just fine.  If you go that route, just be careful that suggestive words/phrases are hidden if the wreath is going to be a gift to a teacher, pastor's wife, or mother-in-law.  Hehe.

Tear out about 65 pages out of your book.  I was able to cut 2 squares from each page.  Cut 130 squares - each measuring 4"x4".  If you are using a smaller wreath, I estimate about 10 squares for every 1" of the wreath, plus about 10 extra to use as filler.

Now, you're going to make 130 (or so) origami fortune tellers.  If you have a daughter between 7 and 13 this might be a fun project to do together.  I say "might" because for some families this kind of thing would result in a screaming, crying, rip your hair out, kind of experience.  But for many others, this would be a fun bonding experience!  So, use your best judgement on who you include in your crafting time.  Just remember, it's supposed to be fun!  (If you decide to go it alone, I suggest some peppy music or a movie as a background noise for your folding.  It's gonna take a while!)

For those that don't remember or never learned, here's how to fold a fortune teller:
(and if you have no idea what a fortune teller is, click here)

Start with 1 square of paper.  I used a 4"x4" square.

Fold it in half horizontally, then unfold, and fold in half vertically.

Now, fold the corners in to meet in the middle.

Turn the square over (so the folds are on the back), and repeat what you just did.  
Fold the corners in to meet in the middle.

Now, turn the square over, and poke your fingers into the 4 small pockets as shown.

With your thumbs and pointer fingers in these pockets, you can push them together to meet in the center.

This is what it looks like from the top.

Except, for this wreath, that is actually the bottom.  If you flip this over, you can see the flower shape.

Once you get the hang of making them, you will want to used glue dots or a tape runner to glue the fortune teller together on the back.  This makes gluing it to the wreath much easier.  Before I puffed the pockets out, I added glue to the back edges so that when the sides were squeezed together they stuck in the middle.  Hopefully that makes sense.  Just glue them so they stay in the flower shape, and don't go back to being flat.

Now that you've made about a billion little flowers (it will surely feel that way at least), you can start gluing your wreath together.  Test a small area of your wreath with the glue gun first, to make sure that the heat doesn't melt the foam.  I selected a really thick foam wreath, so it wasn't a problem for me.  They also sell glue guns that don't need such high heat settings to work.

Start by attaching your ribbon to the wreath.  I used tacky glue on the ends, and straight pins to hold it securely as it dried.  (I left the pins in place for long term strength).  Plug in your glue gun to preheat while you are doing this.  

NOTE: If you want the back side of the wreath to be pretty, wrap it in fabric, book pages, paper, or ribbon before gluing the flowers on.  You'll only be adding flowers to the front and sides, so the back can lie flat against the wall when it is hung.

Next, I added glue to each flower and started sticking them onto the wreath.  I began by covering the ribbon, and then worked my way around the top, front, and middle.  I kept the wreath flat on the table (on top of scrap paper) while I worked.  The flowers overlap each other slightly.  It's almost like a puzzle to get them smooshed together just right.  But once you glue 4-5 you get the hang of it, and it becomes really fun!


All done:

Voila!  I just love how this one turned out.  And if you'd like some inspiration, here are a few other people's book wreaths.

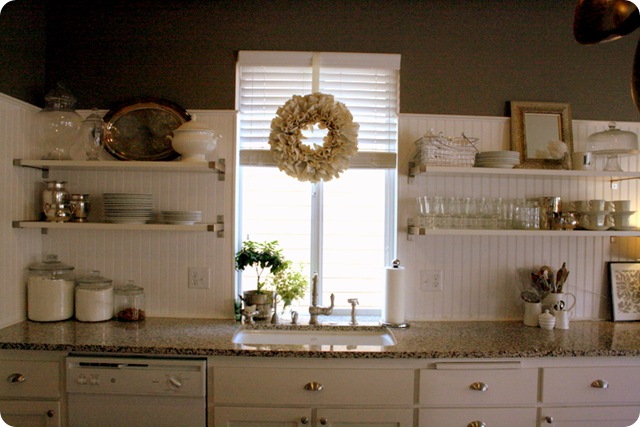
I was originally inspired by this post from the Jones Design Company blog.  You've got to check out her stuff.  AMAZING!!!   Here's a photo of her wreath hanging in her beautiful kitchen:  (She provides a tutorial)
IMG_3936

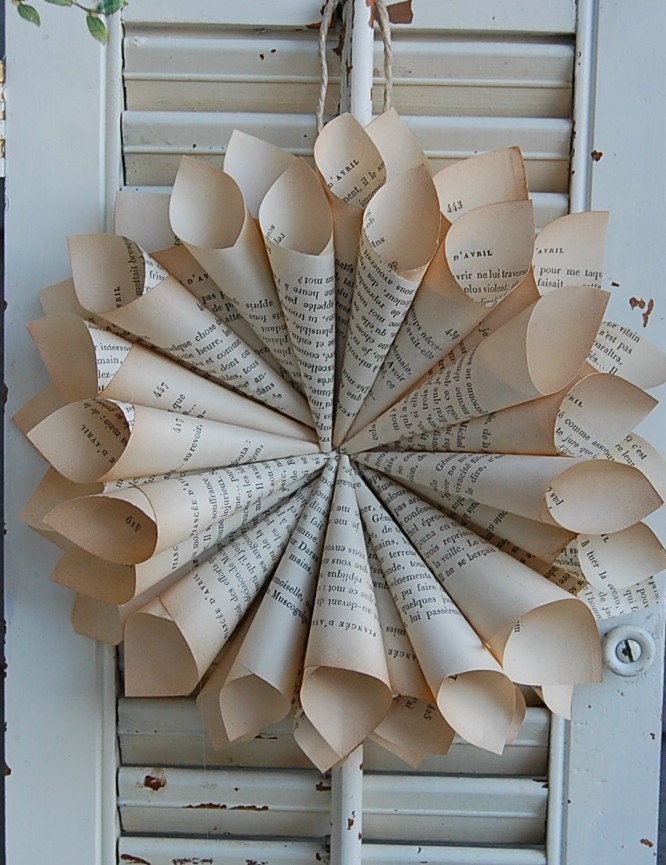
Here are a few I found on Etsy.  Just click the photo to be taken to the listing.
Vintage  Book  Wreath Romantic French  Shabby Paris Chic French Farmhouse

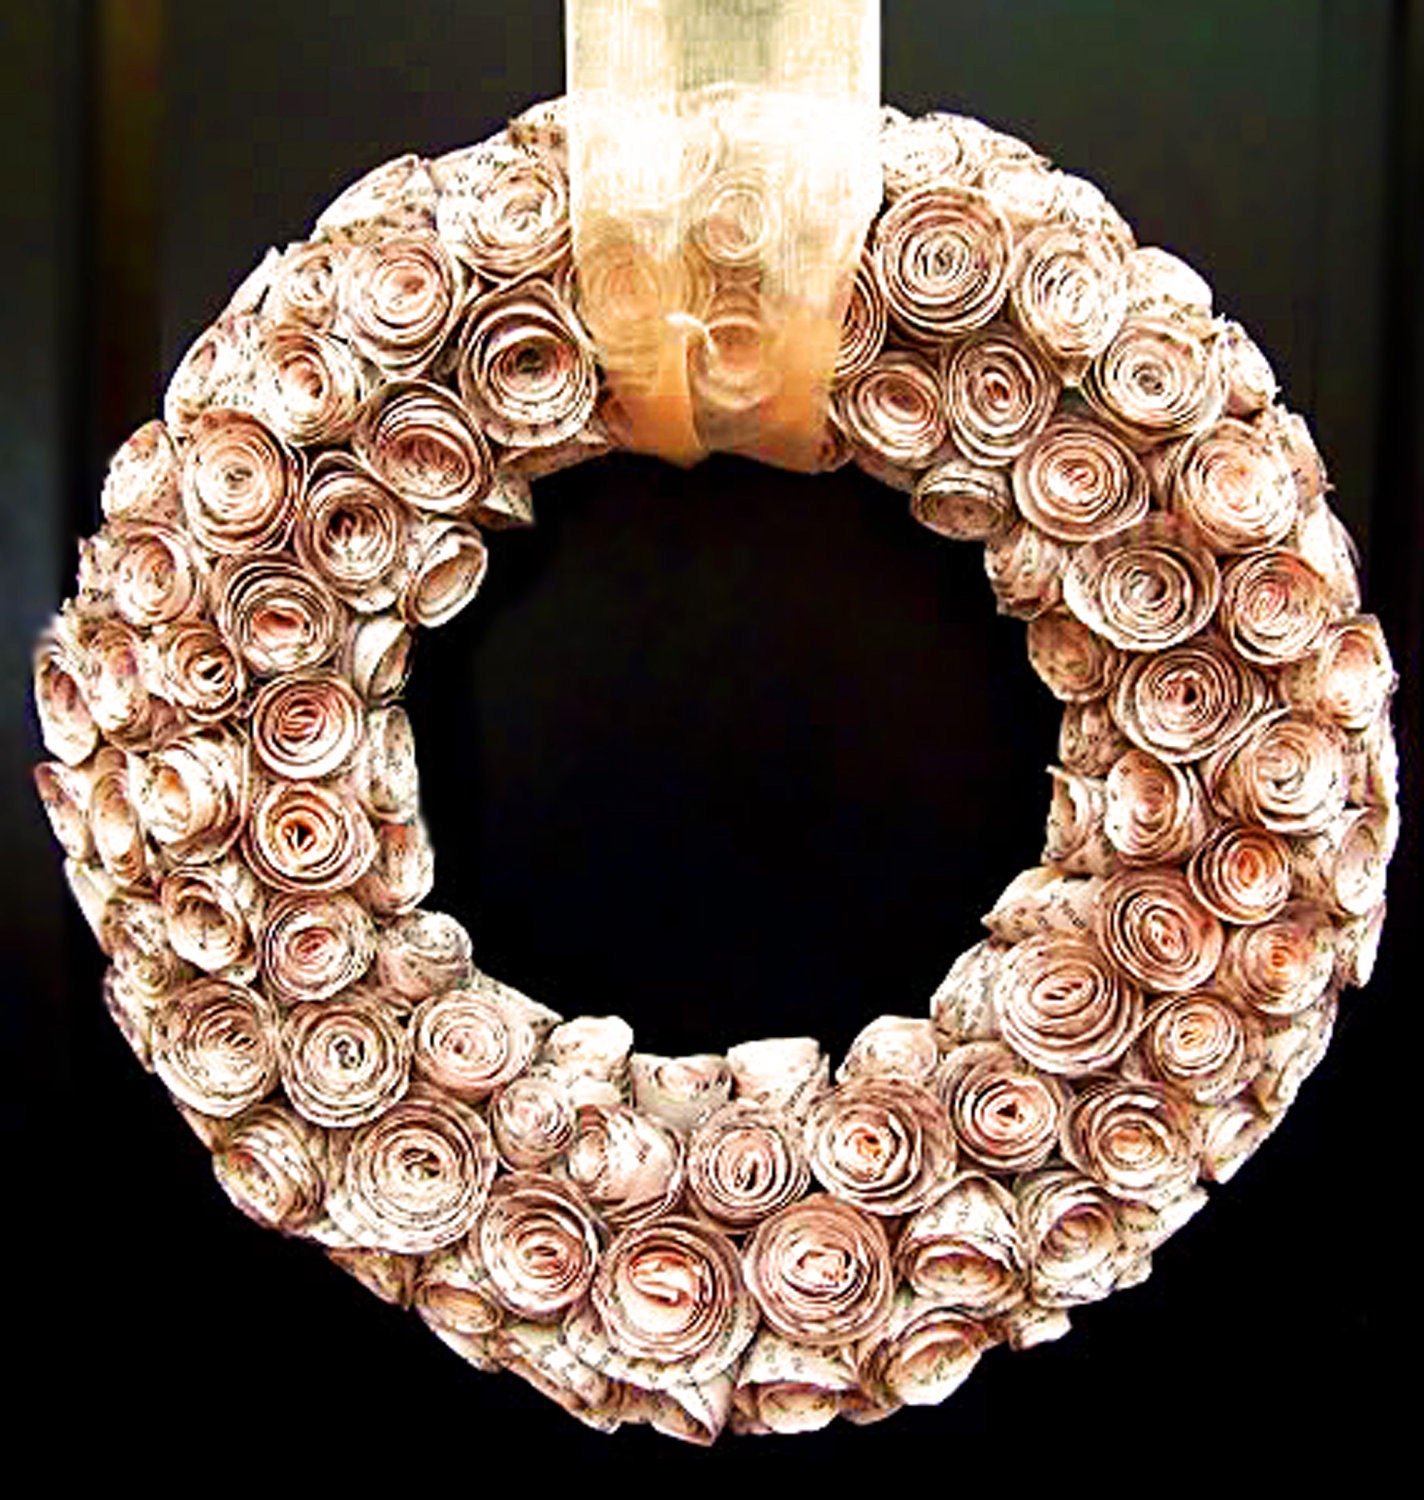
WOWZA!
old dictionary turned rolled paper wreath

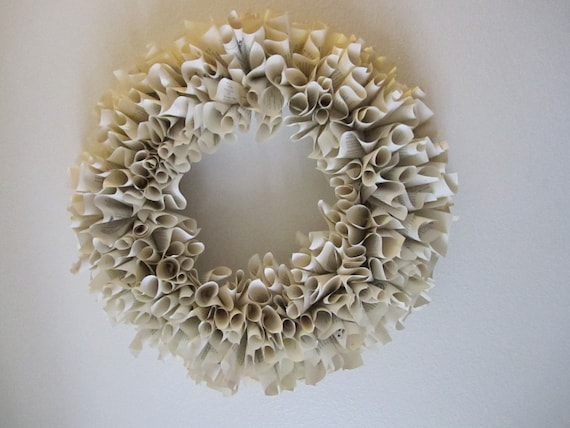
Another great one.
ON SALE: 50% off Recycled Book Paper Wreath (Original price 100)

Hopefully this has inspired you!  If you make a wreath, take a picture and email it to me, and I'll feature it on my blog!  I'd love to see what all of us creative people can do.

Wednesday, June 8, 2011

Junking Treasures Pt 2.

Today I promised you some burlap, so burlap you shall get.  I'll even throw in some pages from the antique french book for good measure!

As I have been developing my "new line" of products for this summer's market, I've delved into making party pennants - also known as banners, signs, and bunting.  It has been SO much fun to do, and as soon as I saw the burlap coffee sacks they were magically transformed into ruffles in my mind.  Yes, I have a strange mind, but if you are a long time reader then you know already know that.  :)

To make this pennant, I tore several pages out of the french book (purchased over the weekend), and modge podged them onto triangular shaped chipboard (thank you CTMH for carrying this awesome product).  Then I cut 1.5"x22" strips of burlap and attempted to pleat it by sewing with a needle and thread.  This is a bad idea, and I don't recommend trying it at home.

My second attempt at creating burlap ruffles involved scouring the scrap room in search of my dusty old glue gun that hadn't seen the light of day since at least the twentieth century.  After finally locating said glue gun, (and running to the craft store for glue sticks) we partied like it was 1999, and that puppy hasn't been unplugged since.  I am IN LOVE with my glue gun.  If my glue gun were human I'd marry it and have its little glue babies.  Dave better watch out, because I swear my glue gun has special powers.  Don't judge me.

(hmmm...maybe I've been sniffing a little too much glue today).

Anyway... back to the burlap.  Using the glue gun (also known as awesome) I was able to just pleat and glue my way along the top of each of the pennant triangles with the burlap.  Then I added a strip of pretty black ribbon (using the glue gun), and some decorative buttons (using the glue gun).

The letters are CTMH chipboard monogram dimensional elements.  I painted them black, and then added a glitter glaze over the top (making memories).  Sadly I couldn't use the glue gun to attach them (I used tacky glue instead).  I thought that using "amour" the french word for love, would be appropriate with the french book background.  And I also thought how lovely this pennant would look in my Parisian themed living room should it not sell at the market.  Wink, wink...


Here are close ups of each letter.  (Sorry about R - it's a bit blurry)


Finally, I strung them all the triangles together using waxed linen.  Then my hubby helped hold it up so I could photograph it (yes, that is his finger on the far right).


This pennant is fairly simple compared to many of the others I've made.  I'm still deciding whether to leave it plain and simple, or add more decorative bits.  Any suggestions are welcome!

Hopefully this post gave you a new idea for using burlap!  Tomorrow will be all about the glue gun again, and more uses for antique book pages, so I hope you come back!

Sunday, April 18, 2010

No Paper?

You might be wondering where I've been and what happened to all my paper?

Well, the short story is that we've been living out of a suitcase for the past 2 weeks and paper isn't all that portable.  Our house is *almost* done and within the next 1-2 weeks we should be able to move in and get back to normal (busy) living.

The longer version is that I have indeed been working with both paper and knitting A LOT the past two weeks, but all of my paper creations are either top secret, or works in progress that I'm not able to share yet!

As a CTMH consultant, I have access to the new Idea Books (in this case the Summer 2010 Idea Book) a month before it goes live to the public.  I've been working my tail off getting samples and class projects done with all of the scrumptious new papers and embellishments.  So come May 1st I will have a plethora of of lovely things to post for you!

In addition, I've been a busy knitter and designer.  I have series of pattern releases coming up soon.  But in the  mean time it means lots of needle work, and not as much time on the computer.

Also - wonderful, wonderful news!  Studio J will be released in just over ONE WEEK!  Monday, April 26th is the magical day and I can't wait for you to have an opportunity to try it for yourself!

So, if you can just hold on for a bit longer, I will have amazing artwork to share.

In the meantime, check out this fantastic commercial I discovered on one of my favorite knitting store's blog (Twisted).  I can't even begin to imagine how much work this took, but it is absolutely creative and visually stunning!  I <3 it.